Supporting Image
Nov 5, 2020 0    
Light scattering and diffraction
Use a laser pointer to measure the thickness of your hair!

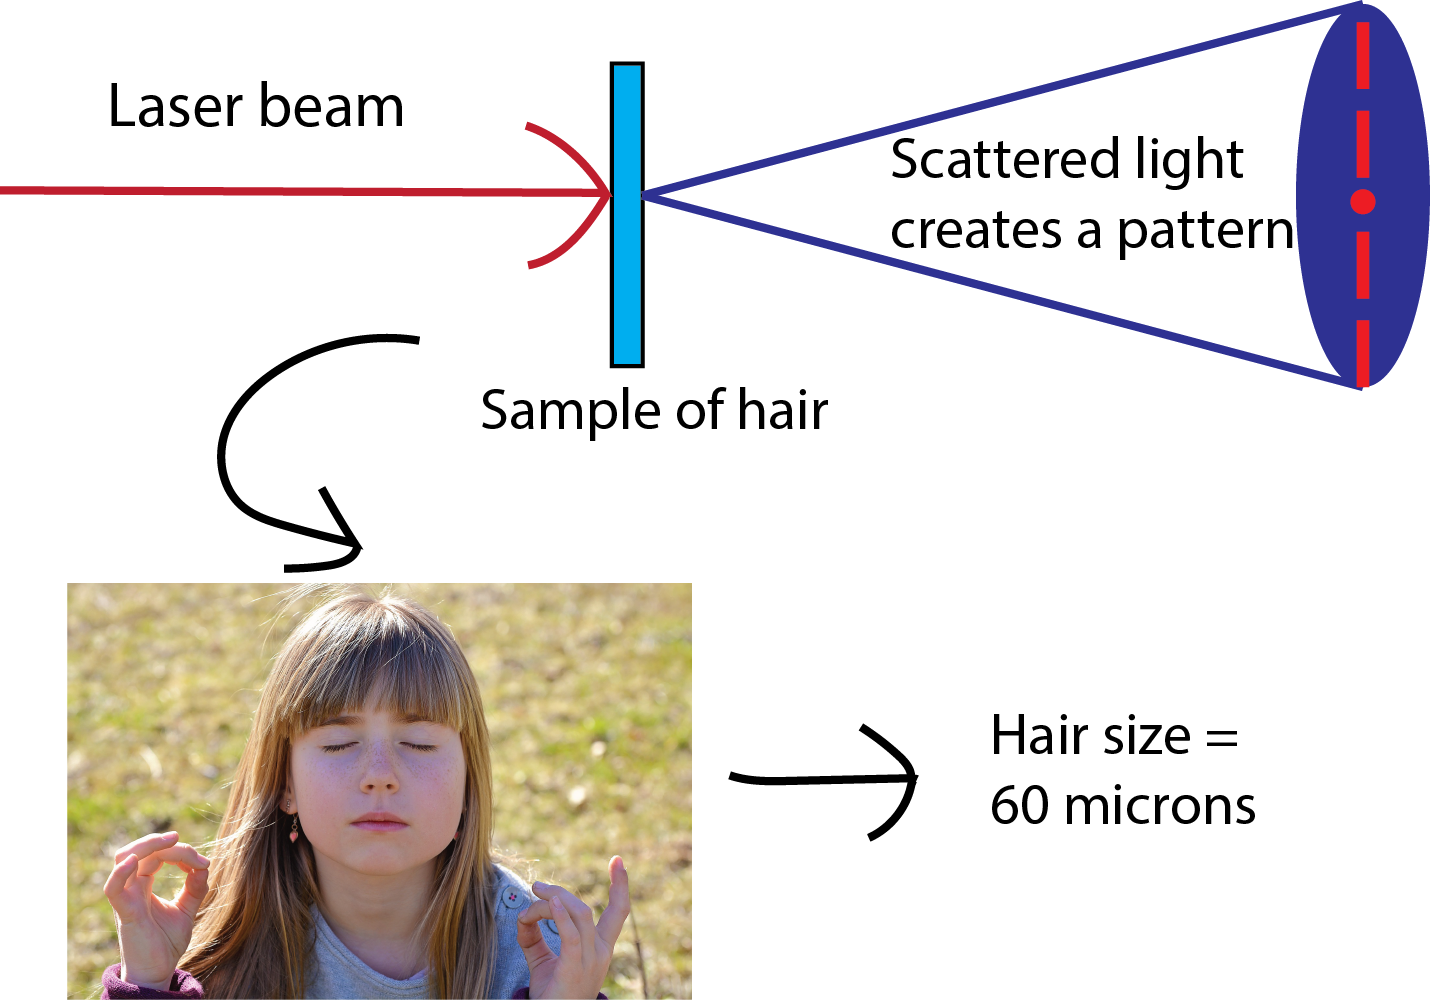
Have you ever wondered how scientists can accurately measure the size of very small objects like molecules, nanoparticles, and parts of cells? Scientists are continually finding new ways to do this, and one powerful tool they use is light scattering. When an incoming beam of light hits an object, the light “scatters,” or breaks into separate streams that form different patterns depending on the size of the object. This incoming light might be visible light, like the light we see from the sun, or it might be higher-energy light like X-rays.

The size of object each type of light can measure depends on the wavelength of the light, which is related to its energy. Larger, lower-energy wavelengths like the colors of visible light can be used to measure larger objects that are visible with the naked eye, while smaller, higher-energy wavelengths like X-rays can be used to measure extremely small objects. National labs like Argonne National Lab outside Chicago operate big X-ray machines that can measure the size of polymers, nanoparticles and other nanometer-scale structures. The light commercial laser pointers emit, on the other hand, is the perfect wavelength to measure the size of a human hair using the same method, outlined below.

This activity was adapted from: https://www.sciencenewsforstudents.org/blog/eureka-lab/measure-width-your-hair-laser-pointer


Approx time: 1 hour
Things you'll need:
  • Cardboard piece larger than 2 in x 2 in
  • Scissors
  • Scotch tape
  • Red and green laser pointers (you will need to note the wavelength of the laser pointers)
  • Hair from students’ heads
Step 1

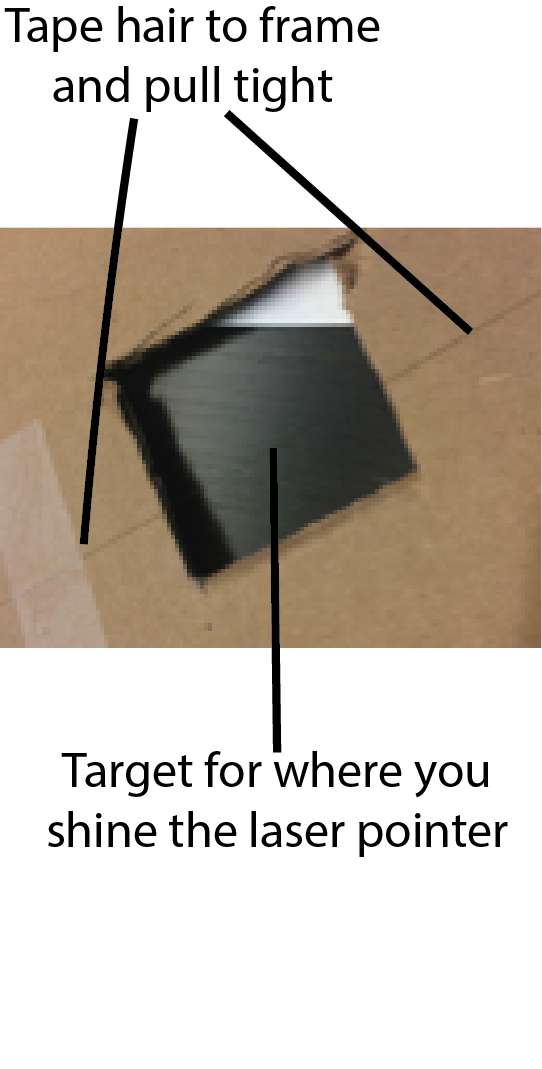
To prepare a frame for the hair, cut a hole in the piece of cardboard, where the hole is approximately 2 inches x 2 inches (or smaller if students have short hair). Pull out a piece of hair ~5 cm long, or as long as you can if your hair is shorter than this. Tape the hair at the top and bottom of the cardboard frame, making sure it is tight and in the middle of the cutout.

Fig. 1 (Click to enlarge). Hair frame (click image to enlarge)
Step 2

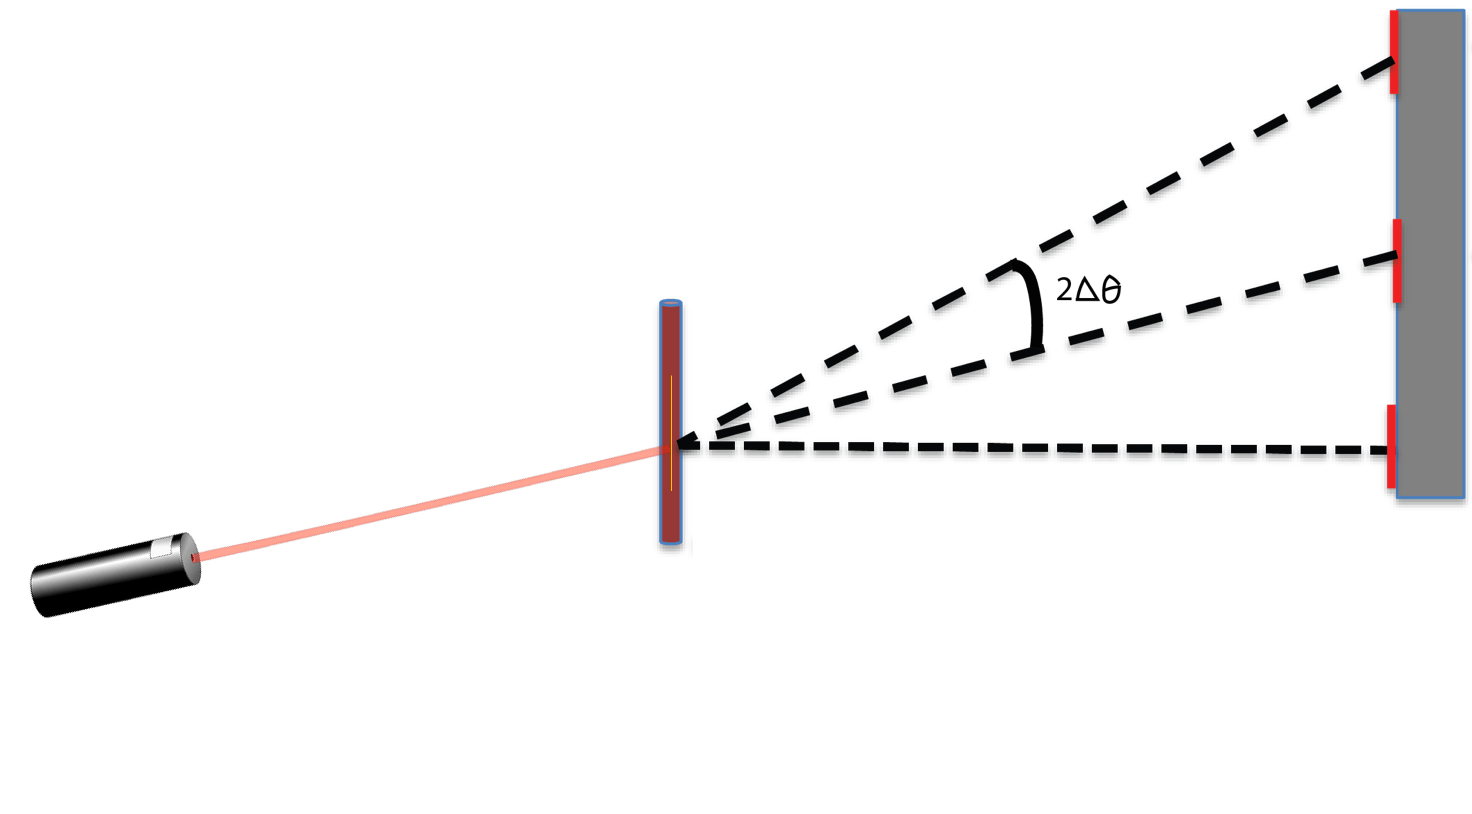
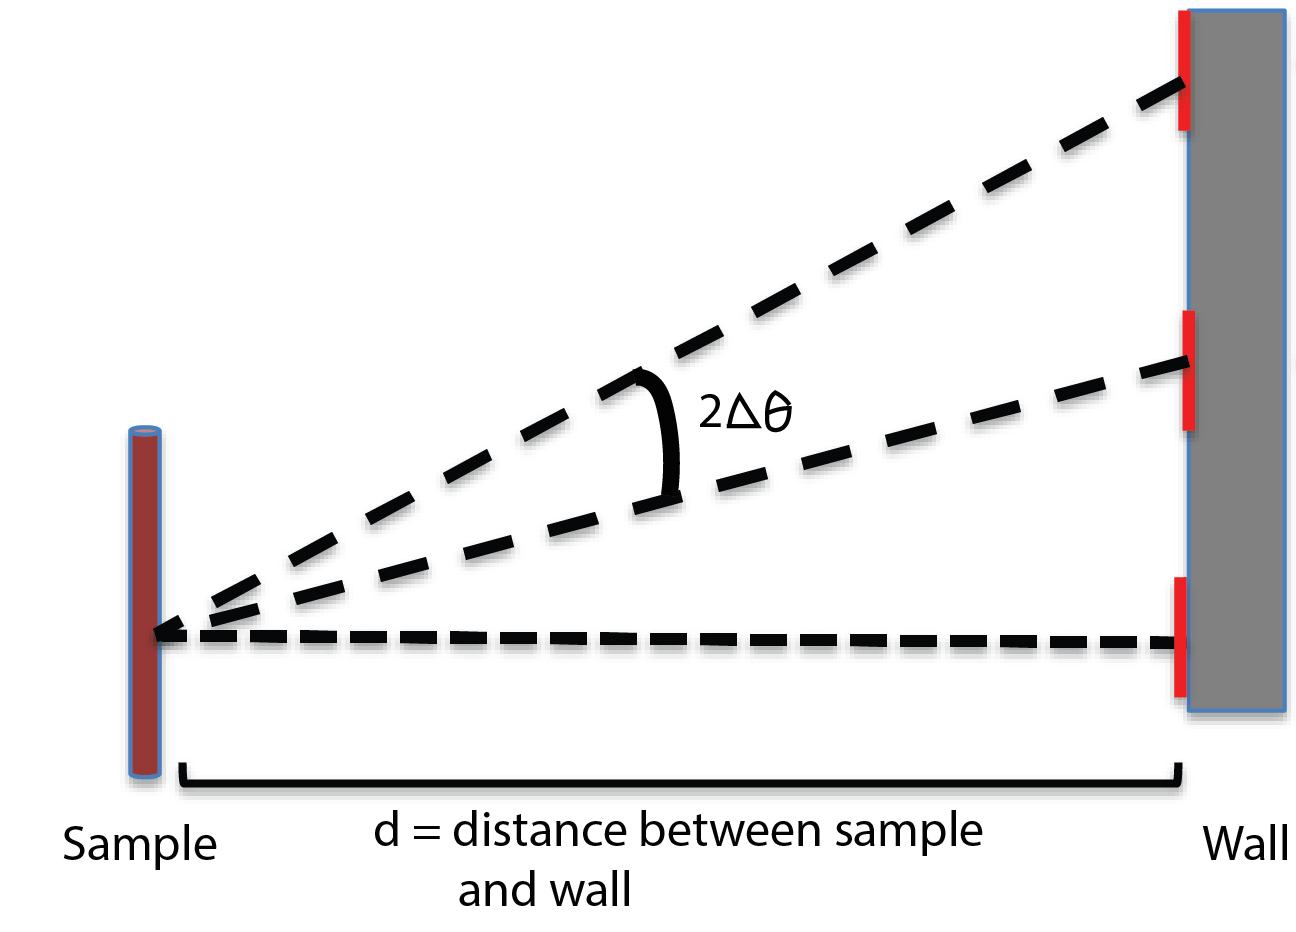
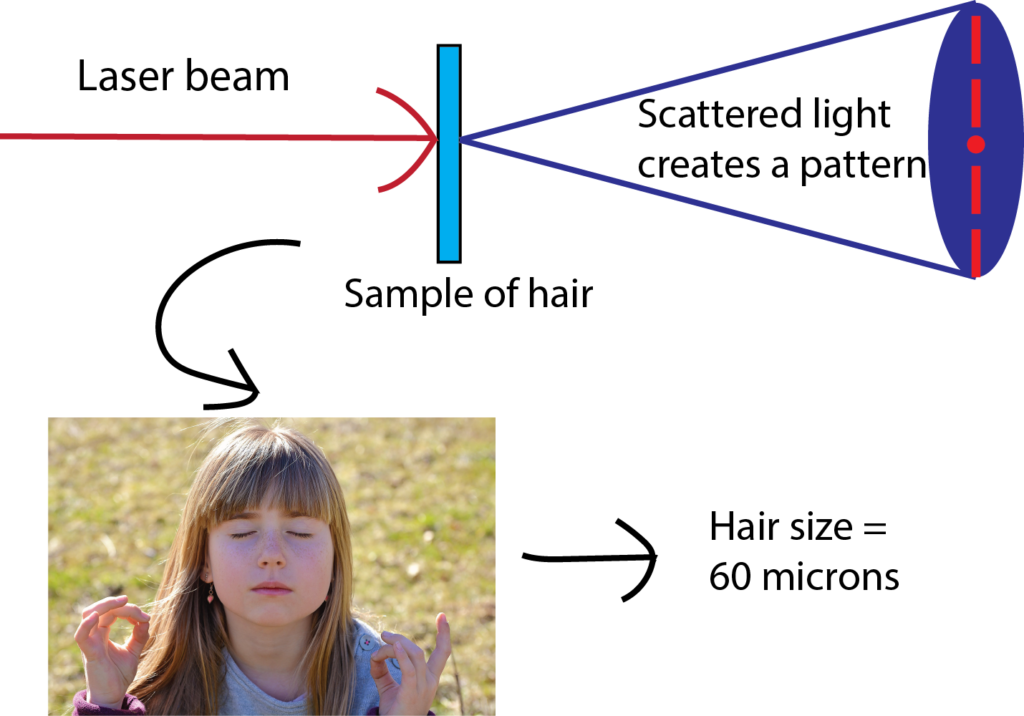
Place the hair sample between the laser pointer and the wall so that the laser pointer beam is hitting the hair directly. You will see a scattering pattern on the wall when you reach this point.  Δθ, which you will calculate later, is called the scattering angle.

Fig. 2 (Click to enlarge). How light scatters (click image to enlarge)
Step 3

Mark the scattering bands on the wall using both the red and green laser pointer, keeping track of which bands correspond to which color.

Fig. 3 (Click to enlarge). Marking the scattering bands (click image to enlarge)
Step 4

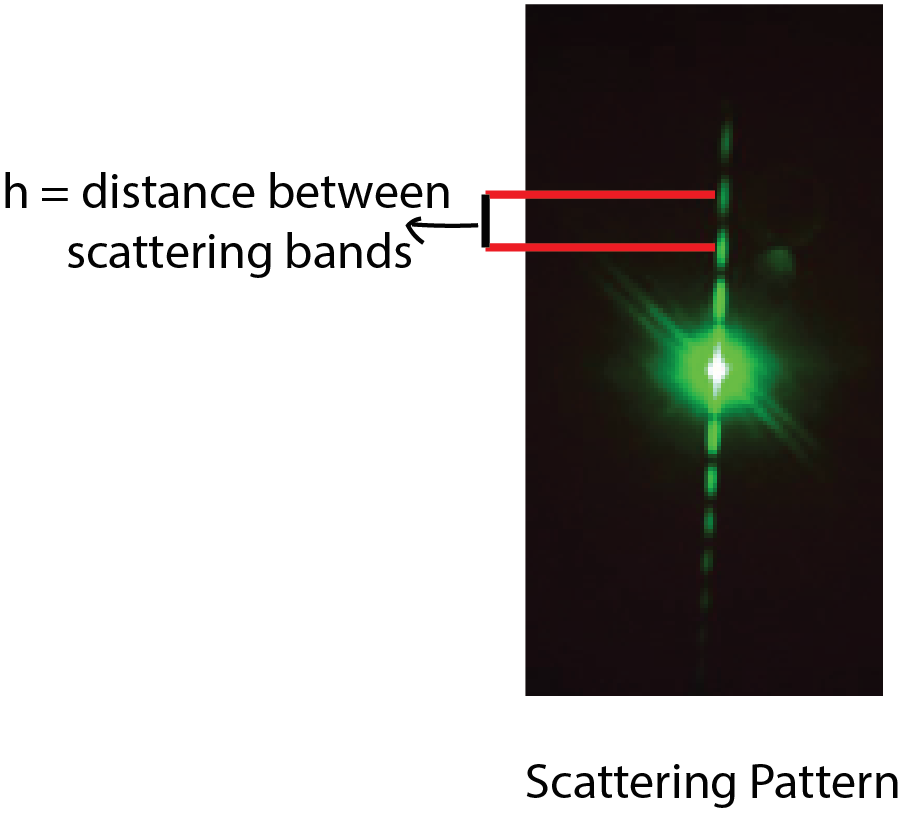
Measure h, the distance between centers of adjacent scattering bands, as shown.

Fig. 4 (Click to enlarge). Measuring the distance from the center of one band to the center of the next band (click image to enlarge)
Step 5

Measure d, the distance between the hair and the wall where the scattering pattern appears.

Fig. 5 (Click to enlarge). Measuring the distance between the hair and the wall (click image to enlarge)
Step 6

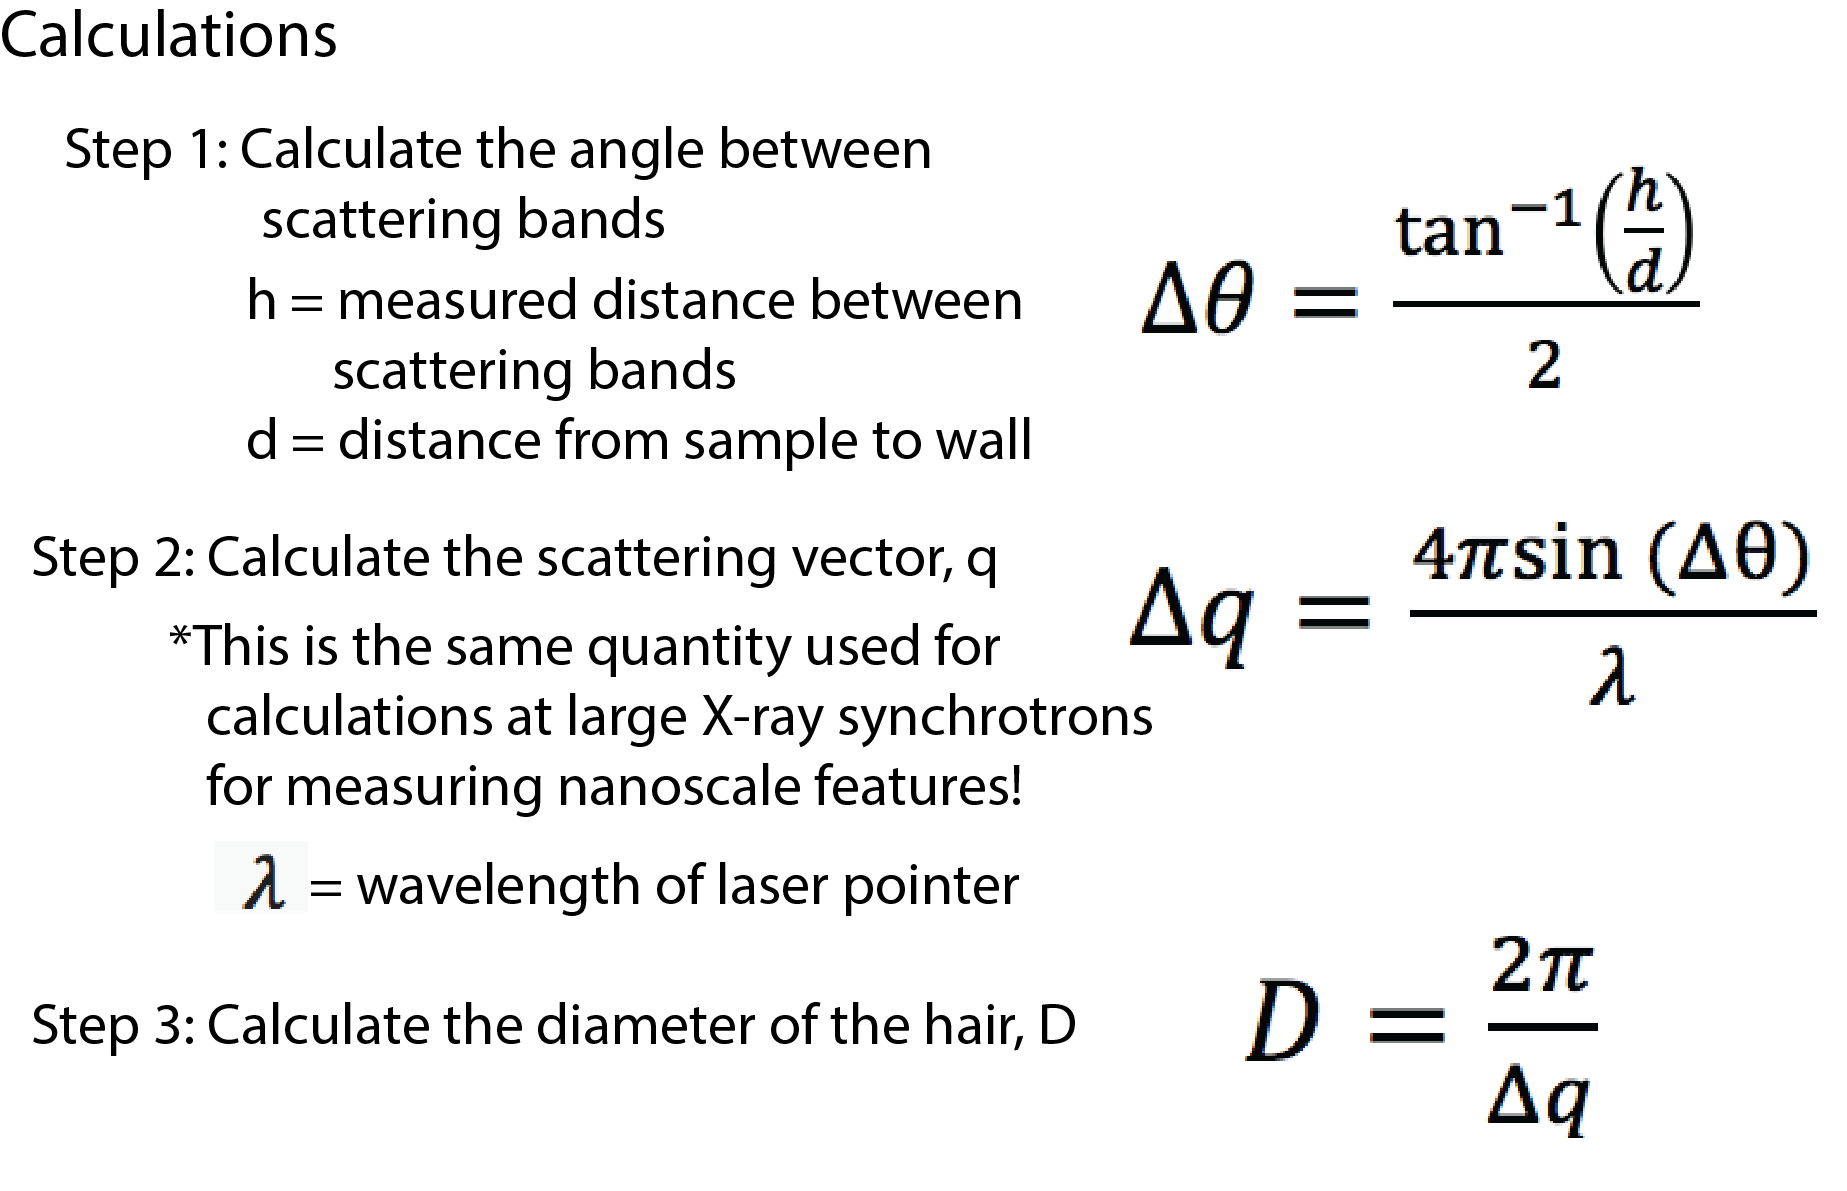
Calculate the diameter of the hair using the calculations shown in the image. You will do a separate calculation for the red light and the green light, but the results you obtain should be approximately equal.  Why do you think this is?

Fig. 6 (Click to enlarge). Calculations (click image to enlarge)
Why it Works

We can directly measure the distance between the hair and the wall, and the distance between adjacent scattering bands.  Once we have this information, we can use geometric relationships to calculate the scattering angle.  The scattering angle depends in a predictable way on two other variables—the wavelength of light used and the size of the object the light bounces off.  If we know any two of these three quantities, we can calculate the third; in this case, we know the wavelength of light from the information provided on laser pointer, and we know the scattering angle from our own measurements and calculations, so we can use this information to determine the size of the object.

To see a demonstration of this activity and how it works, check out the video below from Jefferson Lab!


TAGS: #diffraction    #lasers    #light    #optics    #polymers    #scale    #scattering    #x-rays    
 
SHARE THIS POST:

Related Posts

09/22
Supporting Image
Supporting Image
Funsize Lasers

Soap bubbles are marvelously playful. A cascade of bubbles blown into the air can send children running in circles to pop them before they hit the ground. And if you know how to look, soap bubbles are just as playful on much smaller scales, sending scientists running in circles to understand their fascinating physics. Read on to learn more!

0 0    
04/28
Supporting Image
Supporting Image
Crystal diffraction

Have you ever wondered why some materials are hard and others soft, some conduct heat or electricity easily while others don't, some are transparent to light while others are opaque . . . and on and on and on? The material universe is vast and diverse, and while a material's properties depend in part on the elements it is made from, its structure—how it is built from its constituent atoms—can also have wide-ranging effects on how it looks, feels, and behaves. Diffraction is a method that allows us to "see" the atomic structure of materials. Read on to find out how it works!

0 0    

More Funsize Activities

05/19
Supporting Image
Supporting Image
Electric Crystals, Part 3

Students make paper models of crystal unit cells and build a large crystal structure together while reflecting on the role of symmetry in crystal formation. This lesson is part 3 of a 4-part student-driven, lecture-free series, in which students will do card sorts, build hands-on models, solve engineering design puzzles, and more!

0 0    
05/18
Supporting Image
Supporting Image
Electric Crystals, Part 2

Through hands-on activities using gumdrops and toothpicks, students will learn about unit cells that make up the repeating structures of crystals like table salt. This lesson is part 2 of a 4-part student-driven, lecture-free series, in which students will do card sorts, build hands-on models, solve engineering design puzzles, and more!

0 0    
11/30
Supporting Image
Supporting Image
Domains and Disks
by Shireen Adenwalla, Xiaoshan Xu

Magnets curve themselves into beautiful patterns called domains, which cannot be seen with the naked eye. Now that magnetic paint and nail polish are easily available, we can use magnets to create all kinds of magnetic patterns which we can see, photograph, erase and rewrite! Click to find out how YOU can paint with magnets!

2 2    
11/05
Supporting Image
Supporting Image
Light scattering and diffraction

Have you ever wondered how scientists can accurately measure the size of very small objects like molecules, nanoparticles, and parts of cells? Scientists are continually finding new ways to do this, and one powerful tool they use is light scattering. When an incoming beam of light hits an object, the light "scatters," or breaks into separate streams that form different patterns depending on the size of the object. This incoming light might be visible light, like the light we see from the sun, or it might be higher-energy light like X-rays. The light from commercial laser pointers, it turns out, is perfectly suited to measure the size of a human hair!

0 0    
05/08
Supporting Image
Supporting Image
The Visible Spectrum and Spectroscopes
by Wesley Sliger, Martin Centurion

Have you ever wondered why shining light on a glass of water causes rainbows to appear? Or noticed the colors that reflect from a CD or DVD? In this lesson, you will make an instrument called a spectroscope that can separate light into its hidden components. You will also be able to use the spectroscope to understand why different colored objects and light sources appear the way they do.

0 0    
02/12
Supporting Image
Supporting Image
Forming nanostructures

Self-assembly is the process by which individual building blocks—at the smallest level, atoms—spontaneously form larger structures. The structures they form depend on the size and shape of the building blocks, and on the conditions to which these building blocks are exposed. This can be demonstrated quite simply using breakfast cereal, or for more complex cases using specially prepared Legos.

0 0    
03/14
Supporting Image
Supporting Image
Chemical vapor deposition

Graphene is a two-dimensional material made from a single sheet of atoms, with outstanding mechanical, electronic, and thermal properties. It is a promising candidate to enable next-generation technologies in a wide range of fields, including electronics, energy, and medicine. This economical, safe, and simple lab activity allows students to make graphene via chemical vapor deposition in 30–45 minutes in a classroom setting.

0 0    
02/19
Supporting Image
Supporting Image
Making upside-down images

We can easily observe light with our eyes, and so it is one of the most familiar parts of the world around us. And yet, light often does amazing and unexpected things. Light travels in straight lines from the source to our eyes. This fact allows us to understand many of the cool things that light can do. In this lesson, we will observe how light creates mirages and shadows. And we will build a pinhole camera which makes things appear upside-down. We can understand the upside-down images by thinking about the straight line that the light took from the object to the screen.

0 0    

WRITE COMMENT

Go to Top